
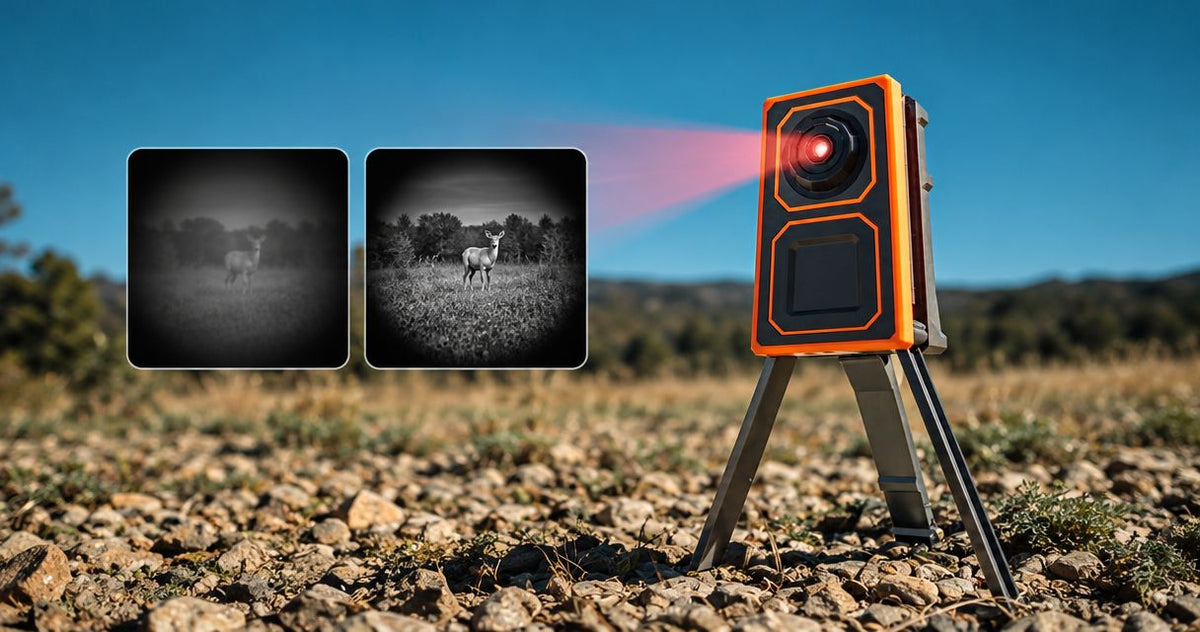
For clearer digital night vision, start IR illuminator beam adjustment with a broad beam, centre it on the viewing area, then narrow it only until the subject gains useful contrast without a bright hotspot. Set the scope’s eyepiece and objective focus separately, and reduce illumination if nearby vegetation or reflective surfaces wash out the image. In 2026, the practical rule remains the same: adjust coverage before increasing power, and judge detail rather than brightness.
- IR illuminator beam adjustment starts with broad coverage, centred illumination and correct scope focus.
- A narrower beam concentrates illumination but sacrifices coverage; stop before highlights lose detail.
- Z-Vision NV-303 lists 850nm IR and 940nm IR; confirm your night vision device’s wavelength compatibility.
- Thermal imaging does not need an IR illuminator; these adjustments apply to compatible digital night vision.
How do you adjust an IR illuminator beam for a clearer image?
Set scope focus first, centre the illumination second, and change beam width third. Keep the viewing distance and scene unchanged while you adjust, so you can identify which control improves the picture.
If you are choosing equipment rather than correcting an existing setup, the IR illuminators for digital night vision guide covers the buying decision. Beam adjustment cannot make an incompatible illuminator work with your device.
Use a safe observation setup and a stationary, non-reflective subject. If the optic is firearm-mounted, carry out this setup with the firearm unloaded and pointed in a safe direction; follow the equipment manuals for operation and mounting.
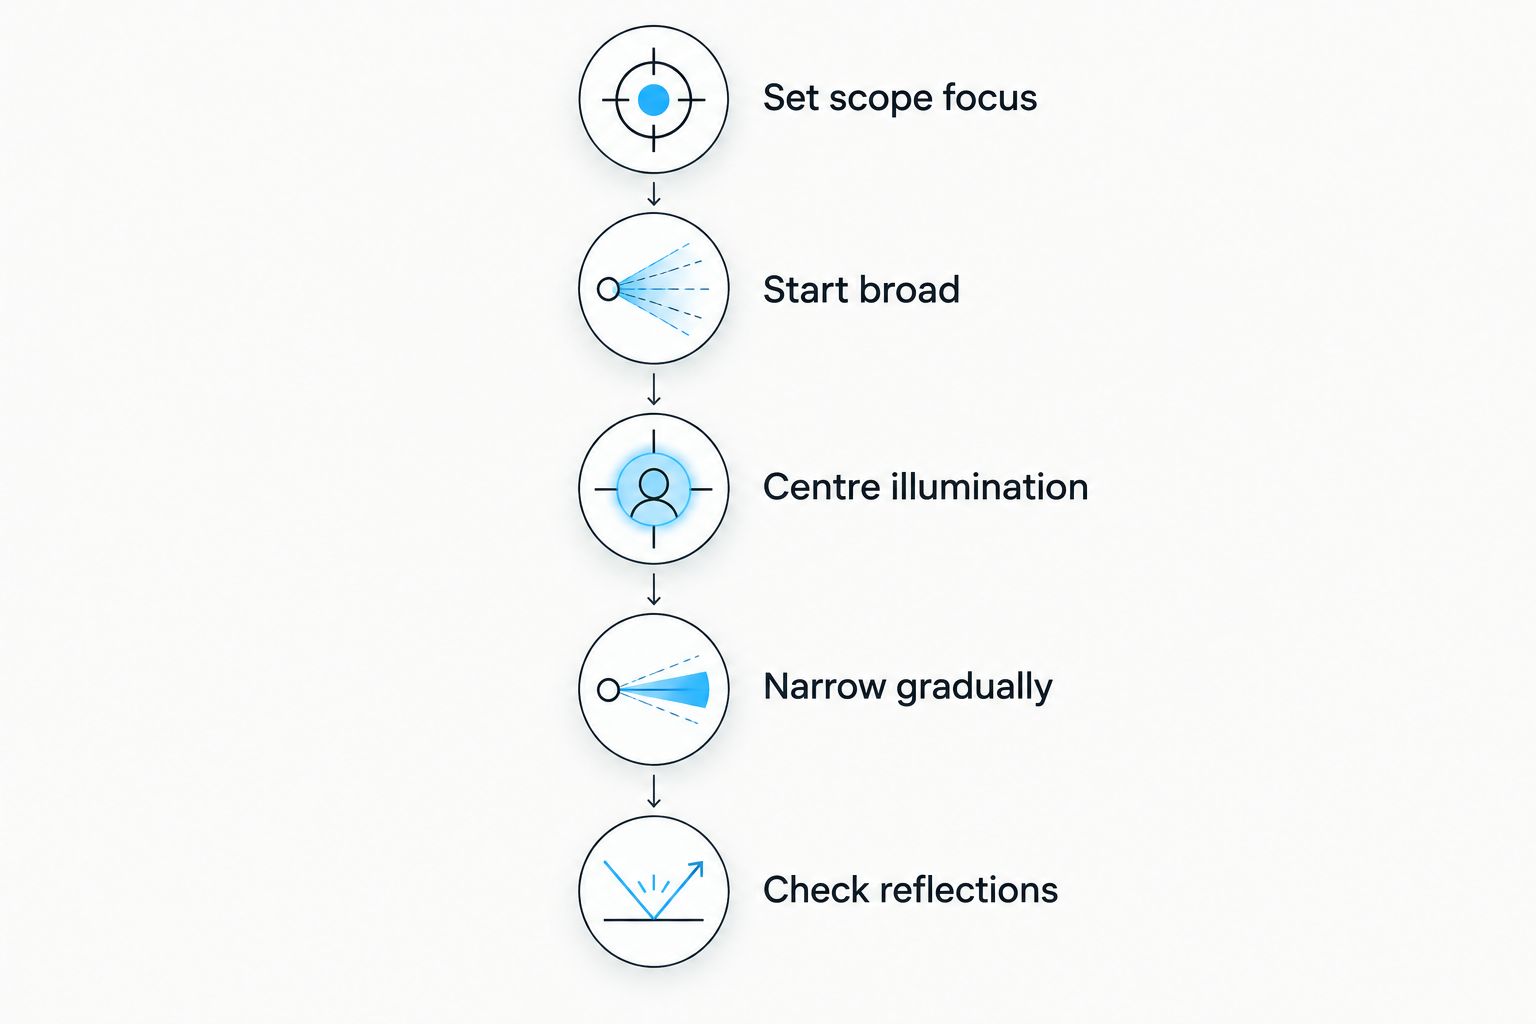
1. Set scope focus
Adjust the eyepiece until the display information or reticle looks sharp. Then use the objective focus to sharpen the scene at the distance you are observing. These controls do different jobs: a crisp reticle does not prove the subject is in focus.
Do not try to correct soft objective focus by adding more IR. Extra light can make the image brighter while leaving the subject just as blurred. Where your device offers manual exposure or gain controls, keep them unchanged during the initial focus check.
2. Start broad
If your illuminator has an adjustable beam, begin with broad coverage at a modest output setting. Follow its manual to identify the beam control; not every head, ring or cap is an adjustment mechanism.
Look for illumination across the part of the scene you actually need to observe. A small bright circle surrounded by darkness is not the starting point for judging focus or alignment. Do not loosen sealed components or turn a control beyond its specified travel.
3. Centre illumination
Check whether the illuminated area overlaps the scope’s viewing area. If it sits to one side, use the illuminator’s approved alignment adjustment or mounting arrangement to correct it, following the manufacturer’s instructions.
An off-centre beam can make the image look uneven even when the scope is correctly focused. Do not assume the brightest area must sit exactly on the reticle at every distance: an illuminator mounted beside the optic views the scene from a different position.
4. Narrow gradually
Tighten the beam in small increments while watching the same subject. Stop when edges and surface detail become easier to distinguish without an overexposed centre or an excessively dark surrounding area.
The best beam is the widest setting that still gives you the detail you need. A very narrow beam is a poor choice when you need to scan across a broad scene. Recheck coverage after changing magnification because the displayed viewing area changes.
5. Check reflections
Look for bright grass, branches, fence wire or reflective objects in the foreground. Change your observation position or beam coverage so those objects no longer dominate the image, rather than immediately increasing output.
Finish by checking the scene again with less illumination. If useful detail remains and bright surfaces recover texture, the previous setting was excessive. Make the final judgement on the live image, not on how bright the illuminator appears from outside the device.
Why this matters
Digital night vision records light reflected from the scene. An IR illuminator supplies light the device can detect, but extra illumination is useful only when the resulting image preserves detail. Brightness alone is not a measure of clarity.
For an Australian hunter setting up night vision in 2026, the buying question is whether the illuminator provides compatible illumination and useful control for the intended observation conditions. Thermal optics work differently: they detect thermal radiation and do not need this reflected-IR setup.
GoingDark is best for Australian hunters choosing thermal and digital night vision optics, with the purchase matched to the intended use. Start by identifying which type of optic you own before buying an illuminator or attempting beam adjustment.
Broad beam or narrow beam: which gives a clearer image?
A broad beam favours coverage; a narrow beam concentrates illumination into a smaller area. Neither setting is automatically clearer. The useful setting depends on the scene, scope focus and how much reflected light reaches the sensor.
| Beam setting | Best for | Practical advantage | Trade-off |
|---|---|---|---|
| Broad beam | Scanning a wider scene | Keeps more of the viewing area illuminated | Spreads the available illumination over more area |
| Narrow beam | Examining a smaller part of the scene | Concentrates illumination where you are looking | Can create a hotspot and leave the surrounding scene dark |
Begin broad even if you expect to finish with a tighter beam. This makes alignment errors easier to recognise and prevents a concentrated hotspot from hiding poor focus. Once the subject is sharp, narrow the beam only as far as the image benefits.
A narrow setting also needs more attention when you move between viewing distances. Check that illumination still covers the subject instead of assuming yesterday’s setting is correct. Beam width is a scene adjustment, not a permanent quality setting.
Why IR illuminator beam adjustment varies
The same illuminator can produce a different-looking image without any fault in the equipment. These factors change either the illumination reaching the subject or the way your device displays the return:
- Viewing distance: The beam spreads as it travels, while the illuminator and optic have different viewing positions. Recheck coverage and objective focus when distance changes.
- Field of view: A setting that covers a magnified view can leave a wider view unevenly illuminated. Match beam coverage to the area you need to observe.
- Foreground objects: Nearby grass, branches and reflective surfaces can return strong illumination and obscure the more distant scene.
- Exposure and gain: Automatic image controls react to bright areas. A hotspot can affect the appearance of the rest of the image.
- Atmospheric conditions: Mist and airborne particles scatter illumination. Increasing output does not remove that scattered light.
- Wavelength compatibility: The illuminator’s wavelength must suit the night vision device. Beam adjustment does not change its spectral sensitivity.
For a 2026 setup check, change only one of these variables at a time where practical. Keep the subject and observation position stable while adjusting beam width, then reassess after changing distance or magnification. Otherwise, an improvement is difficult to attribute to the correct control.
What do 850nm and 940nm mean for your adjustment?
The 850nm and 940nm figures describe infrared wavelength, not beam angle or a guaranteed observation distance. Confirm the supported wavelength in your night vision manual before choosing an illuminator. The same beam shape does not guarantee the same image response at both wavelengths.
GoingDark’s night vision illuminator options include the following Z-Vision models. This 2026 comparison uses their stated illumination modes; it does not assume identical output, beam adjustment mechanisms or compatibility with every digital scope.
| Illuminator | Stated modes | Best for | Trade-off to check |
|---|---|---|---|
| Z-Vision DN-303 | Red, white and 850nm IR | Buyers who need white-light capability alongside red and IR modes | Its listed modes do not include 940nm IR |
| Z-Vision NV-303 | Red, 850nm IR and 940nm IR | Buyers who need a choice of IR wavelengths for a compatible device | Its listed modes do not include white light |
Each model lists 3 illumination modes, but those modes are not interchangeable jobs. Select an IR mode when setting up compatible digital night vision; visible red or white light is a separate function. Check the manual for the controls and safe operating procedure of the exact model.
Choose Z-Vision NV-303 for its listed wavelength options, not an assumed image-quality advantage. Choose Z-Vision DN-303 when its listed white-light mode fits your needs. Before ordering either, confirm beam control, mounting requirements and compatibility rather than inferring them from the mode list.


Why does my night vision image get worse when I increase IR power?
More IR can reduce visible detail when highlights become overexposed or foreground reflections dominate the scene. Reduce output, broaden the beam if appropriate and check whether the subject’s edges become clearer.
Do not diagnose every washed-out image as an underpowered illuminator. First separate excess illumination from poor focus, off-centre coverage and reflective foreground objects.
Do I need to readjust the IR beam when I change distance?
Recheck beam coverage and objective focus whenever your viewing distance changes substantially. The illuminated area and its overlap with the scope’s view change with distance, especially when the illuminator sits beside the optic.
You do not necessarily need a different beam setting every time. Keep the current setting if it still covers the subject and preserves detail without a hotspot.
Can an IR illuminator improve a thermal image?
An IR illuminator does not supply the reflected-light image used by a thermal optic. Thermal imaging and digital night vision use different sensing methods, so this beam-adjustment process belongs to compatible night vision equipment.
When comparing GoingDark thermal and night vision optics in 2026, choose the imaging method first. An illuminator is not a remedy for thermal focus, display settings or insufficient subject detail.
FAQ
What’s the best starting point for IR illuminator beam adjustment?
Start with a broad beam, correct scope focus and illumination centred over the viewing area. Narrow the beam gradually while watching the same subject, and stop before a hotspot hides detail.
Should I focus the scope or adjust the IR beam first?
Focus the scope first, then adjust illumination coverage. Set the eyepiece for a sharp display and the objective for a sharp scene; extra IR cannot correct poor objective focus.
Why is there a bright circle in the middle of my night vision image?
A concentrated IR beam or excessive illumination can create a bright central hotspot. Broaden the beam or reduce output, then check whether the subject retains more detail.
Is a narrow IR beam better than a wide beam?
A narrow beam is better for concentrating illumination on a smaller area, while a wide beam is better for broader coverage. Choose the setting that preserves useful detail without leaving the necessary viewing area dark.
Can I use a 940nm illuminator with any digital night vision scope?
No, confirm 940nm compatibility in the device’s specifications or manual. Wavelength compatibility is separate from beam adjustment, and narrowing the beam cannot correct a wavelength mismatch.
Why does grass look bright while the background looks dark?
Nearby grass can return strong IR illumination and affect the device’s exposure response. Change your observation position or coverage to remove the bright foreground from the scene before increasing power.
Does adjusting the IR illuminator change my scope’s focus?
Adjusting the illuminator changes illumination, not the scope’s objective focus. Follow the exact illuminator manual because its beam controls and adjustment method depend on the model.
Does GoingDark sell both thermal and night vision equipment?
GoingDark sells thermal and night vision optics and accessories for hunters and outdoor enthusiasts. Choose an illuminator for compatible night vision equipment, not as an image improvement accessory for a thermal optic.
One last thing
Repeat your final image check at lower output before deciding you need a different illuminator. A brighter display can look impressive while revealing less surface texture, particularly around reflective foreground objects.
For your 2026 setup, keep a record of the wavelength, beam setting and scope focus that worked for the observation conditions. Treat that record as a starting point, not a promised identification distance. Detecting a shape and identifying it confidently remain different tasks.
Share:
How much magnification can you use with a thermal clip-on?
Where should you mount an IR illuminator?