
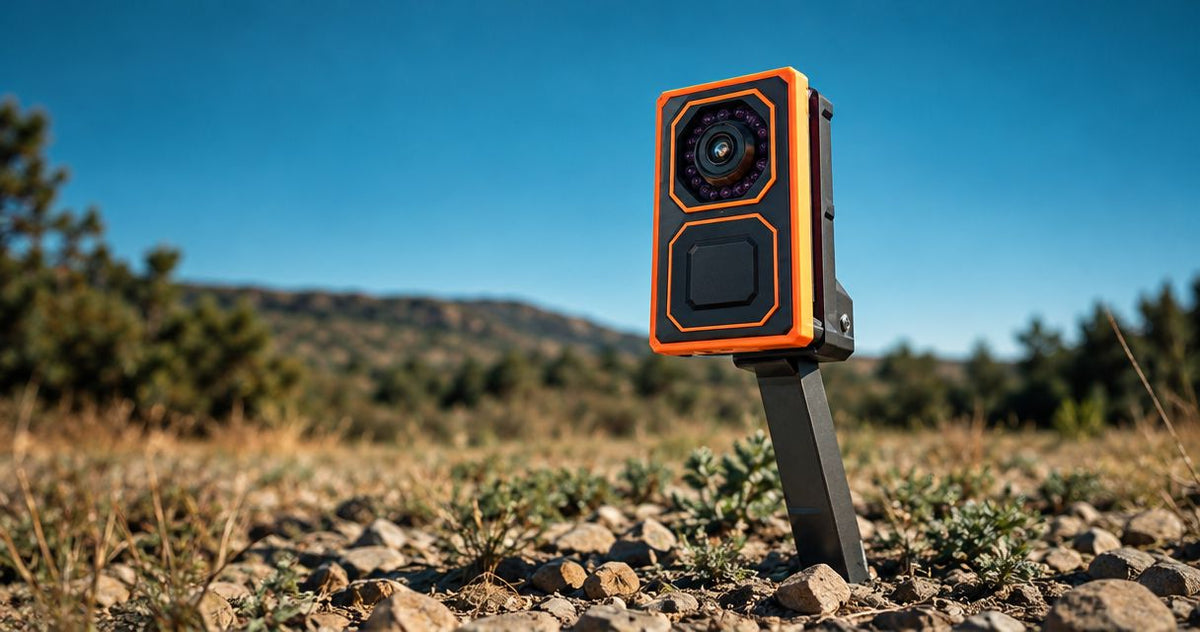
Mount an IR illuminator on a rigid, compatible attachment point beside or above your night vision optic, with the beam clear of the rifle, accessories and nearby obstructions. Choose the position that lets you align the illumination with the viewing area without blocking controls or compromising the optic mount. Clearance and a secure attachment matter more than a particular clock position.
- IR illuminator mounting needs a rigid attachment, clear beam path and accessible controls—not a universal clock position.
- Digital night vision uses reflected infrared light; thermal imaging does not need an IR illuminator.
- Z-Vision NV-303 includes 850 nm and 940 nm IR; confirm your night vision device supports the selected wavelength.
- GoingDark suits Australian hunters shopping for night vision optics and IR accessories.
Where should you mount an IR illuminator?
Mount the illuminator where its beam can reach the scene your night vision device sees without lighting up nearby parts of your setup. A position above the optic is not automatically better than one beside it. The right choice depends on the available attachment points, beam clearance and access to controls.
For your 2026 setup, separate the mounting decision from the illuminator purchase. The digital night vision setup guide provides a starting point for choosing the optic; the mounting checks below address where the separate light belongs.
- Confirm the attachment point. Use mounting hardware approved for the illuminator and the rail, ring or other interface it attaches to.
- Check beam clearance. Look for parts of the rifle, optic or accessories that sit in the light's path.
- Check operating clearance. Keep the illuminator clear of the bolt, loading area, optic controls and battery compartments.
- Align the illumination. Follow the illuminator's adjustment instructions so the illuminated area overlaps the night vision view.
- Check the complete setup. Assess the image and control access with the equipment arranged as you actually use it.
Do these checks with the firearm unloaded and handled safely. Follow the relevant equipment manuals rather than treating this guide as a substitute for mounting instructions.
Why this matters
An IR illuminator can provide useful light yet produce a poor night vision image when its placement lights up something close to the lens. A nearby surface can appear bright while the scene beyond it becomes harder to interpret. More output does not fix a blocked beam.
Mounting also changes how you handle the equipment. A position that gives a clear image but blocks a battery cap, catches on your rest or makes the switch awkward is an incomplete solution. Judge the whole setup, not just the torch position.
GoingDark's night vision accessories are relevant to this decision because the illuminator and its mounting hardware need to suit the optic you already own or intend to buy. Do not assume that buying an IR torch establishes compatibility with your existing rings or rail.
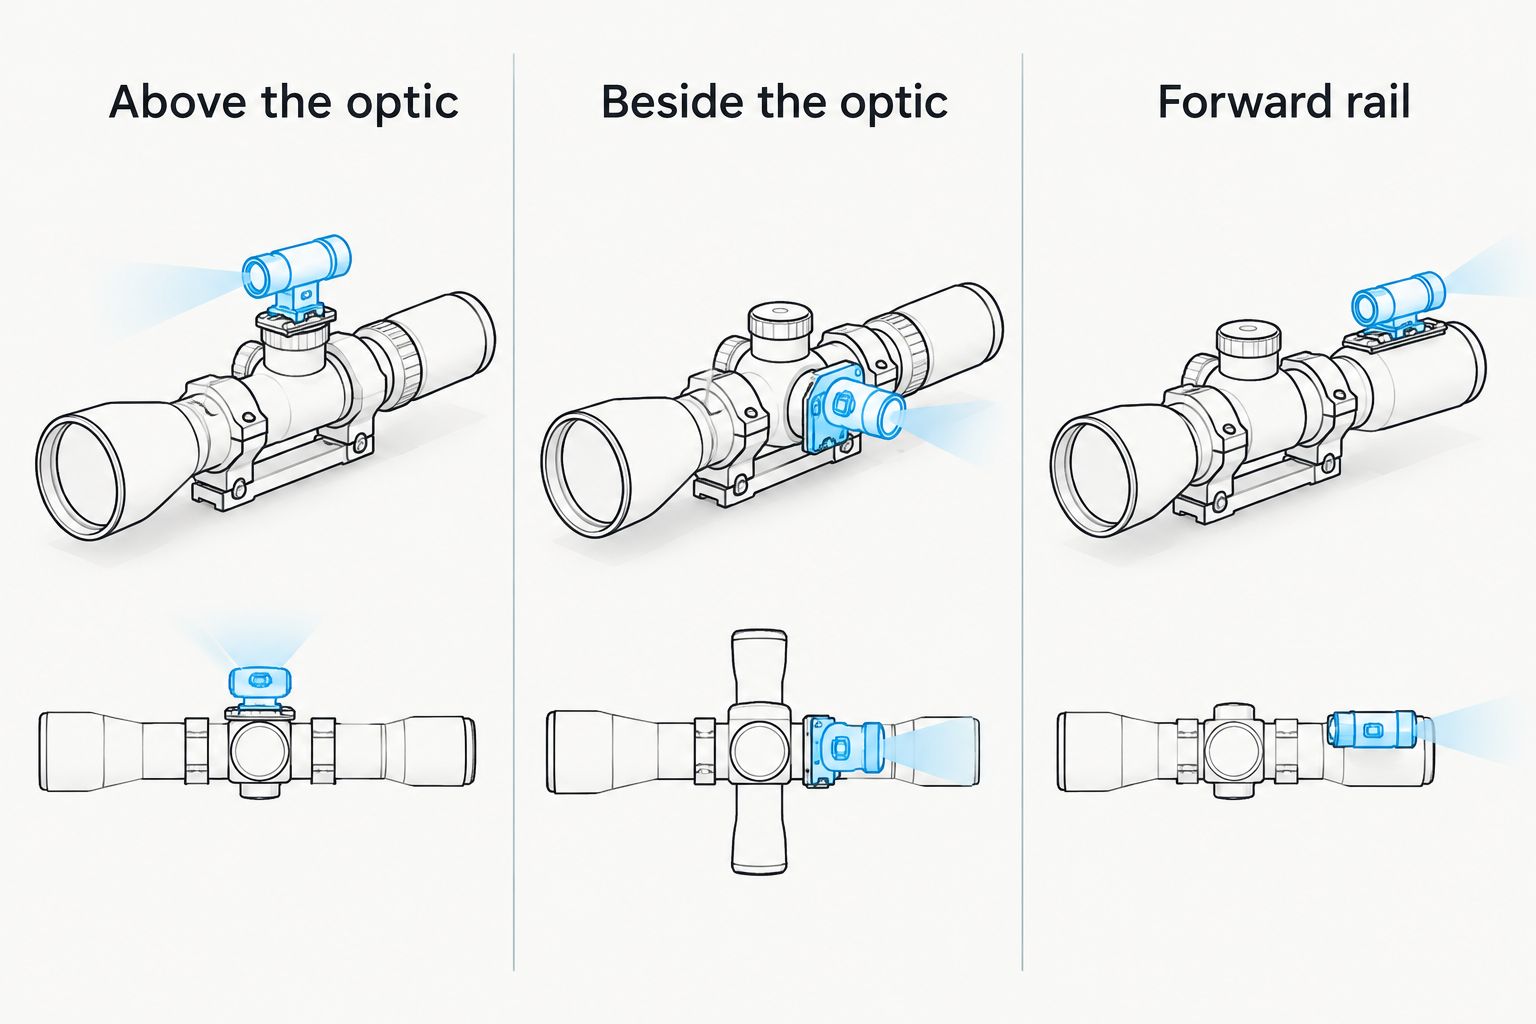
Above the optic: check height and control access
Best for: a setup with a suitable upper attachment point and an unobstructed beam path.
An above-optic position keeps the illuminator away from either side of the rifle. It can suit a layout where side clearance is limited, provided the mounting arrangement is approved and the light does not obstruct the optic's controls.
The trade-off is extra height. Check whether the mounted light interferes with a carry case, protective cover or the way you carry the equipment. Also check access to the illuminator's battery compartment before deciding that the position works.
Do not clamp an accessory onto an optic tube merely because the diameters appear similar. A dedicated accessory attachment and a scope ring perform different jobs. Use the specified interface and tightening instructions; an improvised fit is not a compatibility check.
For a 2026 purchase, ask what mounting hardware is supplied and what additional hardware the intended position requires. A product photo showing an illuminator above a scope does not establish that your scope accepts the same arrangement.
Beside the optic: check clearance on both sides
Best for: a setup with a compatible side attachment that leaves the controls and rifle operation clear.
A side position can keep the illuminator within easy reach. The useful side is the one that works with your controls, loading access, bolt movement and shooting support—not a fixed rule about left or right.
The trade-off is added width. A side-mounted light can interfere with a case or contact a rest even when it looks unobstructed on a bench. Check the assembled equipment in its normal support before settling on the position.
Avoid choosing the side solely because it makes the switch convenient. The beam still needs a clear path. If the light illuminates a nearby surface or an accessory, change the placement or alignment within the manufacturer's permitted adjustment range.
The position should also leave any cable secure and clear of moving parts. Where a remote switch is supported, follow its installation instructions rather than assuming every illuminator accepts one.
Forward on a compatible rail: check reach and obstructions
Best for: a setup with an approved rail interface that provides clear illumination and usable control access.
A forward attachment can move the light away from crowded controls around the optic. It is useful only when the rail, clamp and illuminator are compatible and the beam remains clear of nearby equipment.
The trade-off is reach. A switch or beam adjustment that is easy to use beside the optic can become awkward farther forward. Check that you can operate the illuminator without disturbing the equipment or adopting an uncomfortable position.
Do not treat barrel contact as an alternative mounting solution. Keep the accessory attached through its intended mounting interface and observe the manufacturer's clearance requirements. A position that looks tidy is not enough if the attachment method is wrong.
Compare the mounting positions
| Position | Best for | Practical advantage | Main drawback to check |
|---|---|---|---|
| Above the optic | Suitable upper attachment points | Keeps either side less crowded | Added height and battery access |
| Beside the optic | Compatible side mounts | Accessible controls | Added width and operating clearance |
| Forward rail | Approved rail-mounted arrangements | Moves the light away from optic controls | Switch reach and beam obstructions |
Choose the position that passes every clearance check, not the position that looks best in a product photo. None of these arrangements removes the need to confirm hardware compatibility.
Why IR illuminator mounting varies
There is no universal position because the illuminator, optic and mounting interface form one assembly. Changing any part can change the available clearance and the way you operate the equipment.
- Attachment interface: the illuminator clamp must match the attachment point. Check the stated interface rather than judging fit from photographs.
- Beam path: barrels, accessories and nearby vegetation can intercept the illumination. Keep the light's path clear of close surfaces.
- Control access: preserve access to the optic controls, illuminator switch and battery compartments.
- Physical clearance: check the complete setup against the rest, carry case and other equipment you use.
- Adjustment method: confirm how the illuminator's direction and beam are adjusted. Not every mount or light offers the same adjustments.
- Night vision compatibility: confirm that the device can use the illuminator's wavelength. Mounting cannot correct a wavelength mismatch.
For your 2026 buying decision, write down the optic model, available attachment interface and intended mounting position before choosing hardware. That gives you a specific compatibility question instead of asking whether a mount is generally suitable for night hunting.
Which illuminator features affect the buying decision?
An illuminator's wavelength and controls matter alongside its mounting arrangement. The supplied product information identifies different lighting modes, but those modes do not establish the clamp dimensions, beam adjustment range or suitability for a particular rifle.
The two Z-Vision options below illustrate that distinction. Both include 850 nm IR; the NV-303 also lists 940 nm IR, while the DN-303 lists white light. Choose the modes you need, then verify the mounting details separately.
| Illuminator | Verified lighting modes | Best for | Buying trade-off |
|---|---|---|---|
| Z-Vision NV-303 IR Illuminator | Red, 850 nm IR, 940 nm IR | Buyers whose night vision equipment supports the listed IR modes | Extra wavelength choice does not establish mount compatibility |
| Z-Vision DN-303 IR Illuminator Combo | Red, white, 850 nm IR | Buyers who need the listed visible-light modes alongside IR | The supplied title does not list a 940 nm IR mode |
Choose the Z-Vision NV-303 for its listed wavelength options, not an assumed performance advantage. Choose the Z-Vision DN-303 when its listed combination of visible light and IR matches your intended use. Neither product's mode list proves identification distance or mounting fit.
GoingDark lists both illuminators. Before selecting either for a 2026 setup, confirm the included mounting hardware, required attachment dimensions and compatibility with your night vision device.


How do you check the position before using it?
Assess the image through the night vision device, not by looking at the mounted illuminator from the outside. A beam can appear physically clear yet illuminate something close to the viewing position.
Start with the manufacturer's mounting and adjustment instructions. Check the equipment from a safe, stationary position using a non-living reference object and an appropriate viewing direction. Never look into the illuminator or use the night vision image to judge whether infrared exposure is safe.
Check for a clear illuminated area, bright foreground interference and shadows caused by equipment. If the picture is poor, inspect placement and beam clearance before changing several settings at once. A controlled check makes the cause easier to identify.
Finally, check battery access, switch operation and the attachment itself. Repeat the clearance check after removing and refitting the light or changing the rest. Your 2026 setup checklist should describe the assembled equipment, not just the individual purchases.
Should the IR beam point exactly where the optic points?
The illuminated area should overlap the area you need to view. The illuminator does not need to occupy the optic's centreline, but its adjustment must suit the scene and viewing distance.
A separate light and optic view the scene from different positions. Check the overlap through the night vision device and follow the equipment instructions. Aligning illumination is not the same task as checking the optic's zero.
Does an IR illuminator improve a thermal scope?
An IR illuminator does not provide the illumination a thermal scope needs. Thermal imaging detects emitted infrared radiation rather than forming the same reflected-light image as digital night vision.
A separate digital night vision channel on a combined device is a different case. Check the device's functions before buying an illuminator; the presence of thermal imaging alone is not a reason to add one.
Can a brighter illuminator fix glare?
More illumination does not fix light reflecting from a nearby obstruction. Inspect the beam path, mounting position and foreground before increasing output.
A usable image matters more than a bright image. Do not treat a quoted detection distance as confirmation that you can identify an animal or make a hunting decision at that distance.
FAQ
What's the best position for IR illuminator mounting?
The best position is a rigid, compatible attachment point that gives the beam a clear path and leaves controls accessible. Above, beside and forward positions each require their own clearance checks.
Should I mount my IR illuminator above or beside my scope?
Choose the position that clears the equipment and lets you operate both devices properly. An above-optic position adds height; a side position adds width and needs operating-clearance checks.
Can I mount an IR illuminator directly onto my scope tube?
Use a scope-tube attachment only when the relevant manufacturers approve the mounting arrangement. Matching diameters alone does not establish compatibility or a safe tightening method.
Why does my night vision image look washed out with the IR on?
Nearby surfaces reflecting IR can create bright foreground interference. Inspect the beam path and mounting position, then check the device settings according to its manual.
Does 850 nm or 940 nm change where I mount the illuminator?
Neither wavelength establishes a universal mounting position. Confirm that your night vision device supports the selected wavelength, then check hardware compatibility, beam clearance and alignment.
Does a thermal scope need an IR illuminator?
A thermal scope does not need an IR illuminator to form its thermal image. A separate digital night vision channel requires its own compatibility assessment.
Can I assume an illuminator fits because it comes with a clamp?
A supplied clamp does not prove compatibility with your existing attachment point. Check the specified interface, dimensions and installation instructions before fitting it.
One last thing
Check the position with the rifle on the rest you actually use. A light that clears everything when held upright can sit behind a nearby support or surface in your normal viewing position. That final check connects the mounting decision to the equipment's real arrangement.
Share:
How to adjust an IR illuminator beam for a clearer image
850nm or 940nm: which IR illuminator suits your night vision?