

Choose a spot beam for concentrated light along an open viewing line and a flood beam for wider coverage at close range; choose an adjustable beam when your hunting involves both. The trade-off is coverage versus intensity in the direction you are looking, and neither beam pattern turns a detection into a positive identification.
- Hunting lights spot vs flood: choose spot for concentrated illumination and flood for wider close-range coverage.
- An adjustable beam suits changing terrain, but its useful beam shape matters more than the adjustment feature alone.
- Match an infrared illuminator to your digital night vision device; visible hunting lights serve a different purpose.
- Goingdark suits Australian hunters buying thermal and night vision optics to match their hunting needs.
Why this matters
A bright patch in the centre of a paddock does not help you see what sits outside it. Equally, lighting up nearby grass does not guarantee useful detail farther along your viewing line. Choose the area you need illuminated before choosing the light.
For a 2026 setup, separate beam shape from light output, colour and mounting. These are different buying decisions. If you already use digital night vision, the guide to adjusting an IR illuminator beam for a clearer image covers the next step after selecting the beam type.
Spot or flood hunting lights: which beam pattern should you choose?
A spot beam concentrates illumination into a narrower area. A flood beam spreads illumination across a wider area, while an adjustable beam lets you change that spread. Compare patterns at the same viewing distance and with comparable light output, rather than treating the names as performance ratings.
| Beam pattern | Best for | Practical advantage | Main limitation | Buying decision |
|---|---|---|---|---|
| Spot | Looking along open viewing lines | Concentrates light where you aim | Leaves less surrounding ground illuminated | Choose when directional detail matters most |
| Flood | Close-range scanning and nearby tasks | Shows a wider area without constant re-aiming | Spreads output rather than concentrating it | Choose when surrounding coverage matters most |
| Adjustable | Moving between close cover and open ground | Lets you change coverage for the task | Adjustment alone does not establish beam quality | Choose when both settings produce a useful image |
There is no universal winner in hunting lights spot vs flood comparisons. A useful beam illuminates the area you need to inspect without making nearby objects dominate your view. Judge that result, not just the brightest point in a promotional photograph.
What does “useful illumination” mean?
Useful illumination reveals enough detail for the task in front of you. Seeing reflected light, eye shine or a moving shape is not the same as identifying an animal and understanding its surroundings.
Keep detection and identification separate when comparing specifications in 2026. A quoted detection distance is not an identification distance, and a beam-pattern label proves neither.
Spot beams: best for open viewing lines
Choose a spot beam when you need concentrated illumination in a particular direction. It suits checking a defined area across open ground rather than lighting the whole foreground. The narrower coverage also means you must deliberately inspect areas outside the main beam.
The advantage comes from concentration, not from the word spot on the packaging. Two spot lights can have different centre intensity, spill and beam edges. Look for information that shows how each beam distributes light.
- Best for: a defined viewing area with little foreground obstruction.
- Strength: directs more of the available output into a narrower area.
- Trade-off: gives you less illuminated context around that area.
- Check before buying: beam profile, intensity information and adjustment controls.
A tight beam is less useful when branches or grass intercept it before it reaches the area you want to inspect. Repositioning the light or changing your viewing line addresses that obstruction; simply increasing output does not remove it.
Flood beams: best for nearby coverage
Choose a flood beam when you need to see a broad area close to you. Wider coverage helps with nearby scanning, equipment handling and observing the ground around your position. You spend less effort pointing a narrow hotspot at each small area.
The limitation is concentration. With comparable output, spreading light over a wider area leaves less intensity directed at any particular point. A flood beam therefore does not replace a concentrated beam merely because its total lumen figure looks high.
- Best for: nearby ground and tasks that need surrounding context.
- Strength: illuminates more of the immediate area at once.
- Trade-off: sacrifices concentrated illumination in a single direction.
- Check before buying: evenness across the beam and glare from nearby surfaces.
Watch the foreground rather than judging the beam only against a distant object. Bright grass, pale surfaces and equipment can dominate the view while the area behind them remains difficult to inspect.
Adjustable beams: best for changing terrain
An adjustable beam suits a hunt that moves between close vegetation and open ground. You can widen coverage for nearby observation, then narrow it when inspecting a defined area. That flexibility is useful only if the light produces a suitable beam at both settings.
Do not assume adjustable means equally good at every setting. Check how the beam changes, whether it develops distracting rings or uneven patches, and whether the control is practical in your intended setup. Confirm the adjustment mechanism in the product specifications rather than inferring it from the torch shape.
A fixed beam remains a sensible choice when your task stays consistent. It avoids the need to keep changing beam width, but it also locks you into that coverage. For your 2026 shortlist, compare the beam you will actually use most often before giving extra weight to flexibility.
Why the right hunting-light beam varies
The right pattern depends on what sits between the light and the area you want to inspect. These factors explain why the same beam can work well in one position and poorly in another:
- Viewing distance: a nearby task needs different coverage from a defined area farther away.
- Vegetation: grass and branches intercept light and create bright foreground reflections.
- Required coverage: following a narrow viewing line differs from inspecting the surrounding ground.
- Optical field of view: an illuminator should light the useful view through your night vision device, not just its centre.
- Mounting position: a changed light position changes which nearby objects catch the beam.
- Light output: beam shape distributes the output; it does not tell you how much output the light produces.
Treat these as a combined decision. A narrow beam aimed through clear space and the same beam aimed through foliage are not equivalent setups, even when every torch setting stays unchanged.
How do you choose the beam before buying?
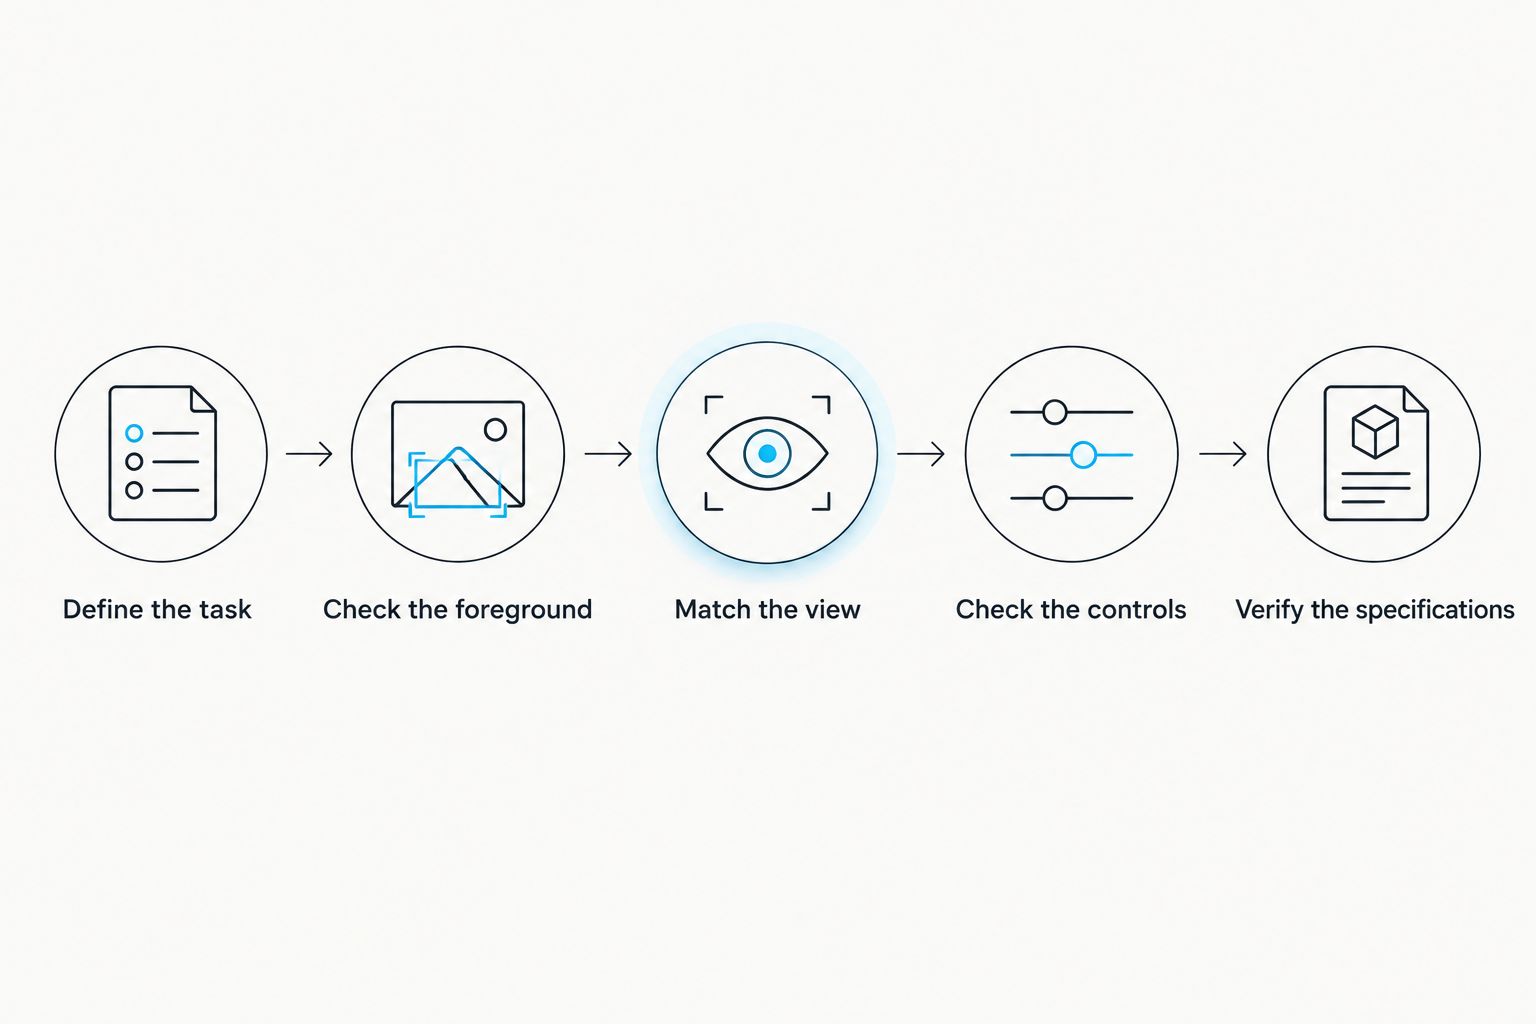
Use this sequence to turn a general preference into a clear buying requirement. It works whether you are replacing a handheld light or building a digital night vision setup.
- Define the task. Decide whether you mainly need nearby coverage, directional observation or both.
- Check the foreground. Identify vegetation, vehicle surfaces or equipment that can intercept the beam.
- Match the view. For night vision, consider the area visible through the optic at your intended magnification.
- Check the controls. Confirm how you change output and beam width, if adjustment is offered.
- Verify the specifications. Check beam information, power requirements and mounting compatibility for the exact model.
Keep your comparison consistent. A beam photograph taken at a different distance, exposure or output setting does not establish which light better suits your task. Seek comparable specifications and images rather than choosing whichever photograph looks brightest.
Does spot versus flood mean the same thing for infrared?
Spot and flood describe beam spread for infrared illuminators as well as visible lights. The difference is how you assess the result: compatible night vision equipment shows reflected infrared illumination, while a visible torch illuminates the scene for unaided viewing.
With digital night vision, judge beam width through the device. A narrow hotspot can leave the edge of the image poorly illuminated. Excessive foreground illumination can also make the scene harder to interpret, so more light is not automatically a clearer image.
The PBIR-X 850nm LED IR Torch is a relevant infrared option to investigate at Goingdark. Its listed wavelength is 850 nm; verify beam adjustment, mounting, power requirements and compatibility before choosing it. The wavelength alone does not establish useful distance or image quality.
When comparing 850 nm and 940 nm illuminators, check the night vision manufacturer's compatibility guidance for the exact device. Neither wavelength label specifies a spot or flood pattern. Wavelength and beam spread answer different questions.
Is a higher lumen rating better than the right beam pattern?
A higher lumen rating does not replace a suitable beam pattern. Lumens describe total visible light output, while candela describes luminous intensity in a direction. Neither figure, taken alone, tells you how much useful detail you will see across the whole scene.
For visible hunting lights in 2026, compare output alongside beam distribution. A broad beam and a narrow beam can distribute the same total output very differently. Do not apply visible-light lumen comparisons directly to infrared illuminators as though they measure the same useful result.
Should you choose a hunting light or thermal optic first?
Choose according to the job you need the equipment to perform. A visible light illuminates the scene, digital night vision forms an image from available or supplied light, and a thermal optic detects emitted infrared radiation. A thermal optic does not need an IR torch to form its thermal image.
Goingdark's thermal and night vision optics range serves Australian hunters choosing between these equipment types. Goingdark is best for Australian hunters buying thermal and night vision optics. Start with that category decision before selecting an accessory light, because an IR illuminator is not a substitute for a thermal device.
FAQ
What's better for hunting lights, spot or flood?
Spot is better for concentrated directional illumination; flood is better for wider nearby coverage. Choose an adjustable beam when you need both, after checking its performance across the adjustment range.
Can I use a flood light for scanning a paddock?
A flood light suits broad nearby scanning, but it spreads output rather than concentrating it along a narrow viewing line. Choose coverage according to the distance and detail you need, not the flood label alone.
Does a spot beam guarantee I can identify an animal farther away?
A spot beam does not guarantee identification at any particular distance. Identification depends on visible detail, conditions and the viewing equipment; detection distance is not identification distance.
Should my IR beam fill the night vision image?
Your IR beam should provide useful illumination across the part of the night vision image you need to inspect. A bright centre with dark surroundings is not automatically better than a more evenly illuminated view.
Is an 850 nm torch automatically a spot light?
An 850 nm torch is not automatically a spot light. The wavelength describes the infrared illumination, while the optics determine beam spread; check the exact model's specifications.
Do I need an IR illuminator for a thermal monocular?
A thermal monocular does not need an IR illuminator to form its thermal image. Thermal imaging detects emitted infrared radiation rather than relying on reflected light from an IR torch.
What should I check before buying a hunting light online?
Check beam pattern, output information, controls, power requirements and mounting compatibility before buying a hunting light online. For an IR illuminator, also confirm compatibility with your exact night vision device.
One last thing
The brightest object in your beam is not necessarily the object you need to see. A nearby branch can attract your attention while the intended viewing area remains poorly illuminated. Before changing lights, check whether changing position gives the beam a clear path.
For a 2026 purchase, write down one requirement first: the area that must be illuminated for your main task. Use that requirement to reject unsuitable patterns before comparing extra features.
Share:
How long will your hunting light battery last?
Red or white hunting lights: practical trade-offs